Testing games automatically
When working on larger projects for longer, or with a team, it can be useful to have automated tests for your game.
Automated tests can be used to:
- Ensure that nobody breaks the features you worked on when they changes the codebase
- Make sure that changes have no unintended side effects
- Have screenshots of your game to compare with previous versions and have marketing material ready for your game
- Reduce time spent on manual testing and QA
Automated tests work great with version control systems like Git and tools to visualize differences like Fork or Sublime Merge! As Git allows you to go back in time and see differences between versions (and screenshots generated by tests!)
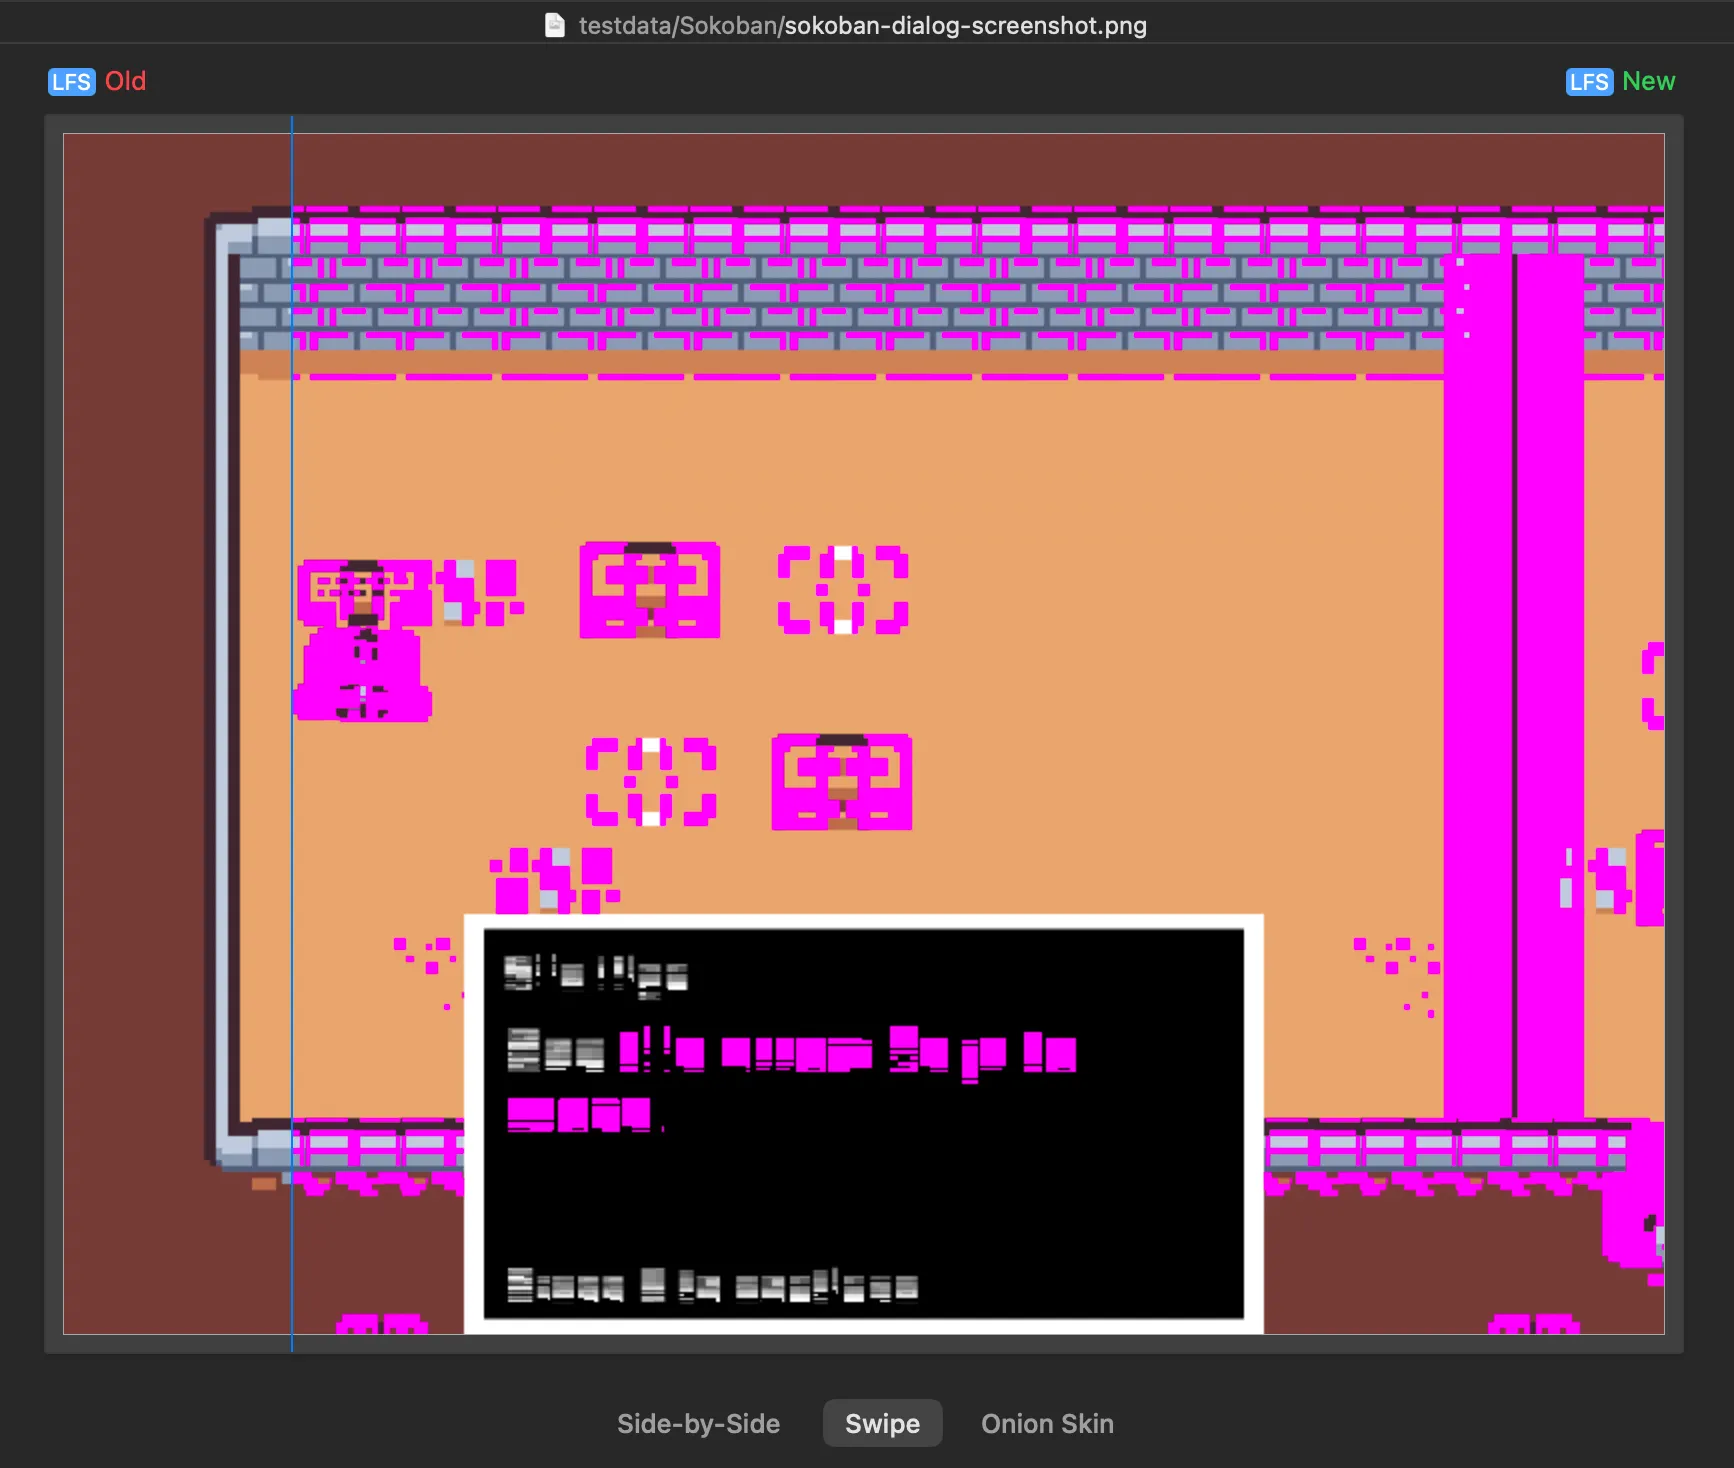 Two versions of a screenshot of a game being compared in Fork, the purple part highlights differences
Testing basics
Section titled “Testing basics”To get started testing, you need to create a file ending with vecta-test.toml in your project. Let’s put it in a test folder which will contain everything
related to testing.
Here is a basic example of a test file:
# Start with defining the game to test and a description of what the test is doing# The path is relative to the location of the test file, so if your game is in the root of your project, you can use "../game.vecta"[project]path = "../game.vecta"description = "The game runs without error"
# A test is a list of steps. If all test finish without errors, the test is considered successful. If any step fails, the test fails.
[[step]]wait_for_frames = 30
# Tests can take screenshots of your game and compare them with a reference.# If the reference does not exist, it will be created automatically.[[step]]compare_screenshot_to = "./basic-screenshot.png"
# You can also check that no errors were logged during the test. If any error is logged, the test will fail.[[step]]expect_no_errors = {}
You can run the tests with the following command:
vecta test --path ./test/basic-vecta-test.toml
You should see (except if there are errors in your game):
➡️ The game runs without error
✅ Test passed.
And the screenshot of your game should have been taken.
If you run the test again, you will see:
➡️ The game runs without error
Screenshot comparison passed: 0% of pixels differ, which is within the acceptable threshold of 5%
✅ Test passed.
This means that the screenshot taken matches the reference screenshot, and the test passed.
If you change your game (by changing a background color for example) and run the test again, it will fail, and you will see something like this:
➡️ The game runs without error
Screenshot comparison failed: xx% of pixels differ, which is above the acceptable threshold of 5%
❌ Test failed.
You can run:
vecta test --path ./test/basic-vecta-test.toml -r
To regenerate the reference screenshots.
More steps
Section titled “More steps”Tests can take screenshots and check for errors, but they can do much more:
- Simulating keyboard and mouse inputs
- Comparing logs produced by your game to a reference log
- Running Lua code in the context of your game
Let’s say that you want to test a specific part of your game world, you could write:
[project]path = "../game.vecta"description = "The lava level looks correct"
# Wait a bit for the game to load[[step]]wait_for_frames = 30
# Run some code to put the game in the state you want to test.[[step]]run_lua_code = "state.current_level = 'lava'"
[[step]]run_lua_code = "teleportPlayer(100, 200)"
[[step]]wait_for_frames = 30
[[step]]compare_screenshot_to = "./lava-screenshot.png"
[[step]]expect_no_errors = {}
# Check that the player dies in lava by moving them to the left, into it.[[step]]press_keys = ["left"]
[[step]]wait_for_frames = 10
[[step]]release_keys = ["left"]
# Wait a bit for the player to die and the game to show the death screen.[[step]]wait_for_frames = 100
[[step]]compare_screenshot_to = "./lava-death-screenshot.png"
[[step]]expect_no_errors = {}
You can also simulate mouse inputs, and check that the console output of your game matches a reference log file.
# Click at a specific location on screen
[[step]]
press_mouse_at = [100, 200]

[[step]]
wait_for_frames = 10

[[step]]
release_mouse_at = [100, 200]

# Compare the console output to a reference
[[step]]
compare_logs_to = "./my-test-logs.txt"
Now that you know how to write tests, you can start writing them for your game!
It is a good idea to run the tests automatically when you push code using a continuous integration (CI) system. This is a more involved topic, but you can find more information about it in the CI/CD guide.
If you are working on a jam project or on a solo project, a CI system is overkill, but on larger games with people programmers, it is helpful.
Remember that you can run all your tests using:
# Run all the test files in the test folder
vecta test --path ./test
All in all, automated tests are a handy tool to keep in your toolbox. Also, the benefit of seeing your game evolve over time in your version control system through the screenshots is a nice bonus!
What if screenshots differ too much between platforms!
Section titled “What if screenshots differ too much between platforms!”Sometimes, screenshots taken on different platforms (Windows, Linux, Mac) can differ too much for the test to pass. This is usually due to differences in the graphics drivers or the way the operating system renders text. In that case, you can increase the threshold for the screenshot comparison:
# Allow 20 percent of pixels to differ
vecta test --path ./test --acceptable_pixel_difference 20
Usually, 10% is a good threshold as test become meaningless if the threshold is too high, but you can adjust it to your needs (or be stricter!).